Poorly labeled wiring creates massive operational hazards across industrial, IT, avionics, and custom manufacturing environments. You lose countless hours troubleshooting unmarked connections when systems go down. Safety risks multiply rapidly when technicians are forced to guess wire functions during live maintenance. Failed compliance audits halt production lines and force expensive rework. Standard adhesive labels degrade, flag, or fall off completely when exposed to heat, solvents, or friction. Heat-shrink tubing provides a permanent, rugged solution for wire identification. However, this method requires specific hardware. You need a dedicated Label Printer to print legibly on tubing without melting, jamming, or smudging the media. You must also understand your workflow constraints before selecting hardware. Pre-termination labeling involves applying heat-shrink tubing before attaching connectors. Post-termination labeling requires self-laminating wraps or flag labels on already assembled cables. Evaluating the right hardware requires assessing print technology, media compatibility, and the deployment environment.
Thermal Transfer is Mandatory: Direct thermal printers cannot print on heat-shrink tubing, as the application of a heat gun will turn the entire label black.
Form Factor Dictates Workflow: Handheld label printers prioritize job-site mobility and quick field patches, while desktop units offer higher throughput and lower cost-per-label for panel builders and high-volume manufacturing.
Media Ecosystem Matters: The upfront cost of the printer is often negligible compared to the long-term cost of proprietary cartridges versus bulk continuous rolls.
Sizing and Scribing are Critical: Printer selection must align with the required shrink ratios (typically 2:1 or 3:1) and the flattened width of the tubing relative to target wire gauges (AWG).
Why Standard Label Printers Fail on Heat-Shrink Tubing
Standard office label makers fail miserably in industrial wire marking applications. Adhesive degradation happens quickly on curved, low-surface-energy wire jackets like Teflon or silicone. Dirt accumulates under the exposed edges of the sticker. Mechanical tension from bending the wire pulls the label apart over time. Temperature fluctuations in engine bays or server racks cause the adhesive to dry out, turn brittle, and fail completely. Wrap-around stickers simply cannot survive harsh mechanical environments where cables are constantly pulled through conduits or exposed to vibration.
Many users fall into the direct thermal trap when trying to upgrade their labeling system. Direct thermal printing uses heat-sensitive paper or film. The printhead darkens the media directly to create text without using an ink ribbon. This chemical reality makes direct thermal fundamentally incompatible with heat-shrink application. When you apply a heat gun to shrink the tubing around the wire, the entire surface of the tube reacts to the high temperature. The label turns completely black instantly, destroying the printed text and rendering the marker useless.
Thermal transfer printing is an absolute requirement for heat-shrink tubing. A thermal transfer device uses a heated printhead to melt a specialized resin or wax-resin ribbon. This process fuses the ink directly into the cross-linked polyolefin tubing. The result is permanent, smudge-proof text that bonds at a molecular level with the tube. It withstands severe abrasion, harsh chemicals, hydraulic fluids, and extreme temperatures without fading. When you shrink the tube, the resin ink compresses with the polyolefin, maintaining sharp contrast and perfect legibility.
| Printing Technology | Mechanism | Heat-Shrink Compatibility | Durability Profile |
| Direct Thermal | Heat-sensitive media darkens upon contact with printhead | Incompatible (Turns black when heated) | Low (Fades in UV light and heat) |
| Standard Adhesive | Inkjet or basic thermal on flat stickers | N/A (Wraps around wire) | Poor on curved surfaces, adhesive dries out |
| Thermal Transfer (Resin) | Heated printhead melts resin ribbon into substrate | Highly Compatible | Extreme (Resists chemicals, abrasion, and heat) |
Handheld vs. Desktop Label Printers for Wire Marking
Handheld and Portable Label Printers
Field technicians, network installers, and custom builders rely heavily on portable units for daily operations. Avionics technicians repairing aircraft wiring and automotive specialists building custom harnesses need mobility above all else. DIY system developers building complex wiring harnesses for 3D printers or CNC machines also benefit from these compact devices. They bring the printing capability directly to the installation site, eliminating the need to walk back and forth to a central printing station.
Industry standards dominate this category for good reason. The Dymo Rhino series, specifically models like the Rhino 4200 and 5200, provides robust field performance with intuitive interfaces. The Brother P-Touch Industrial series, including the PT-E550W, utilizes highly reliable HSe and TZe cartridge systems. These benchmark examples set the standard for portable wire identification, offering drop-in cartridge loading that prevents ribbon wrinkling in dirty environments.
Portable units offer distinct mechanical advantages for field work. They run on rechargeable lithium-ion battery power. Manufacturers ruggedize them with thick rubber bumpers for drop protection on concrete floors. They feature integrated QWERTY or ABC keyboards designed to be used while wearing work gloves. Dedicated hotkeys allow fast serialization, cable wrap formatting, and patch panel alignment. You get immediate, on-site printing exactly where you are pulling the wire.
However, portable devices have strict physical limitations. Sizing constraints present the biggest hurdle for heavy industrial users. Many entry-level handhelds cap compatibility at a 3/4-inch or 19mm flattened width, which restricts you from labeling large battery cables or multi-conductor bundles. They also operate at much slower print speeds compared to benchtop models. You trade high-speed throughput and large size capacity for ultimate mobility.
Desktop and Industrial Label Printers
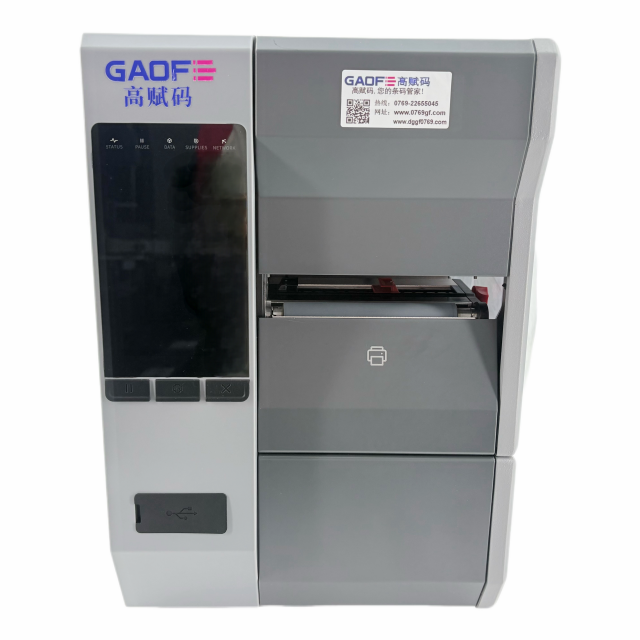
Control panel builders require heavy-duty equipment to keep up with production schedules. Wire harness manufacturing facilities and high-volume IT infrastructure deployments demand massive throughput. These environments cannot rely on battery-powered handhelds with small drop-in cartridges. They need dedicated, continuous-duty machines built for non-stop output across multiple shifts.
Industrial units from brands like Zebra, Brady, and TSC serve as benchmark examples in the manufacturing sector. These machines dominate factory floors and dedicated harness shops. They feature heavy metal chassis construction, robust drive motors, and precision printheads designed for continuous 24-hour operation without overheating.
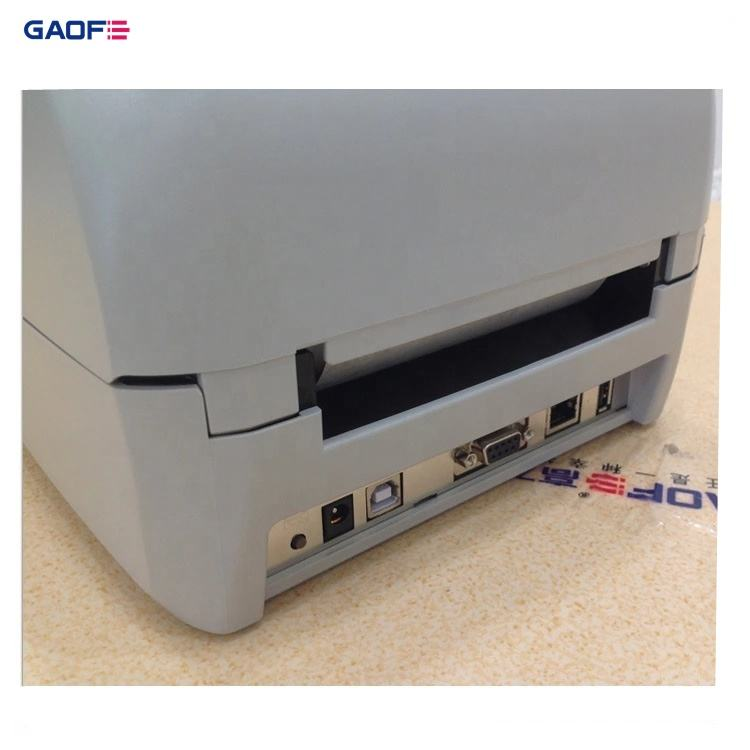
Desktop models provide overwhelming advantages for high-volume work. They offer seamless PC and Mac connectivity via USB or Ethernet. They accept bulk continuous rolls of tubing and massive ribbon spools, which drastically improves operational efficiency by reducing reload downtime. High-speed batch printing clears large jobs in minutes rather than hours. Superior resolution, often 300 DPI or higher, ensures crystal-clear text on extremely small-gauge wires used in aerospace or electronics.
To set up a desktop unit for heat-shrink tubing, follow these specific steps:
Load the bulk continuous roll of flattened polyolefin tubing onto the rear media spindle.
Thread the tubing through the rear feed slot and under the printhead assembly.
Install a full-resin thermal transfer ribbon onto the supply and take-up spindles.
Adjust the media guide sensors to exactly match the flattened width of the tubing to prevent lateral shifting.
Calibrate the printhead pressure toggles to ensure even heat distribution across the thicker tubing material.
Run a media calibration sequence in the printer settings to register the gap or continuous feed sensors.
How to Choose a Label Printer for Heat-Shrink Tubing
Tubing Compatibility, Sizing, and Shrink Ratios
Understanding tubing measurements prevents costly hardware mistakes. You must match the printer feed width to the flattened width of the tube, not the recovered diameter. Flattened width determines whether the media physically fits through the printhead guides. If the flattened tube is too wide, it will jam, crumple, or damage the printhead elements. If it is too narrow, the printhead may strike the bare platen roller, causing premature wear.
Matching wire gauge to tubing size requires a reliable reference. You must account for the outer diameter of the wire insulation, not just the conductive core. Use the following matrix to align standard American Wire Gauge (AWG) sizes with appropriate heat-shrink flattened widths.
| Wire Gauge (AWG) | Recommended Flattened Width | Typical Shrink Ratio |
| 22 AWG - 18 AWG | 1/8 inch (3.2mm) | 2:1 or 3:1 |
| 16 AWG - 12 AWG | 1/4 inch (6.4mm) | 3:1 |
| 10 AWG - 8 AWG | 3/8 inch (9.5mm) | 3:1 |
| 6 AWG - 4 AWG | 1/2 inch (12.7mm) | 2:1 or 3:1 |
| 2 AWG - 1/0 AWG | 3/4 inch (19.1mm) | 2:1 |
| 2/0 AWG - 4/0 AWG | 1 inch (25.4mm) or larger | 2:1 |
Shrink ratio support dictates final legibility on the finished cable. Evaluate how the machine and its software handle 2:1 versus 3:1 shrink ratios. High-quality print software automatically scales text based on the selected ratio. It calculates the shrinkage percentage to ensure characters remain legible, proportionate, and centered after you apply heat. Without this feature, text often compresses into unreadable blocks when using high-ratio tubing on small wires.
Print Durability and Industry Compliance
Environmental resistance defines a successful installation in harsh conditions. Assess the hardware's ability to utilize high-resin ribbons. Full resin ribbons provide critical resistance to UV light degradation, hydraulic fluids, Skydrol, and military-grade solvents. They survive extreme temperature fluctuations in engine compartments without cracking, flaking, or fading over decades of service.
Standardization compliance is mandatory for many regulated sectors. Select a hardware and media combination that meets strict industry codes. Look for UL and CSA certifications for general electrical work. Military and aerospace applications require strict MIL-SPEC compliance, such as SAE-AMS-DTL-23053/5 Class 1 or MIL-STD-202G Method 215K for mark permanence. Verify these ratings on the media spec sheet before deployment.
Software, Connectivity, and Data Import
Batch processing capabilities streamline large projects and eliminate manual entry errors. Evaluate the included software carefully. It must import CSV or Excel files flawlessly. Sequential wire numbering should require only a few clicks to set up complex alphanumeric patterns. Seamless schematic integration prevents technicians from typing incorrect wire IDs during massive panel builds.
Interface usability impacts daily efficiency on the shop floor. Compare physical, on-device hotkeys against desktop WYSIWYG editors. Hotkeys allow rapid serialization and patch panel formatting in the field while balancing the device in one hand. Desktop editors provide precise alignment, custom font selection, logo insertion, and 2D barcode generation for benchtop manufacturing.
Other Wire Labeling Options: Flag Labels and Self-Laminating Wraps
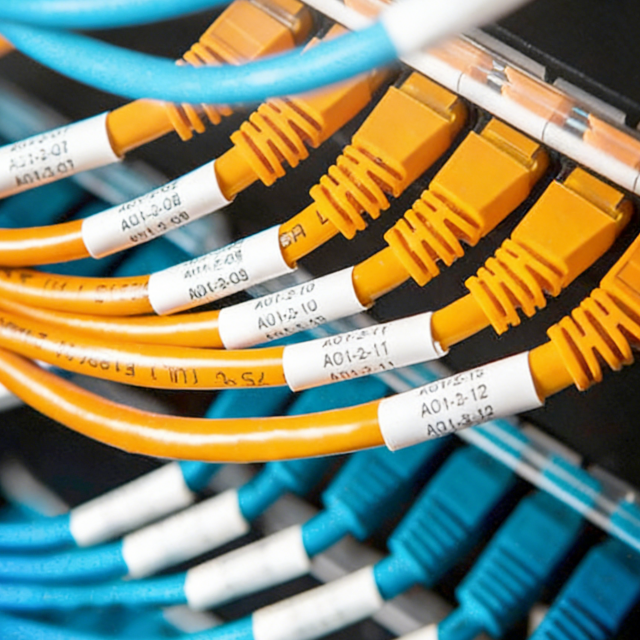
Versatility extends the life of your equipment. Determine whether the device can seamlessly switch between heat-shrink tubing and alternative media. You frequently encounter terminated cables where tubing can no longer slip over the connector, such as pre-made Ethernet patch cables or heavy power cords with molded plugs. In these cases, you need self-laminating vinyl wraps or rigid flag labels.
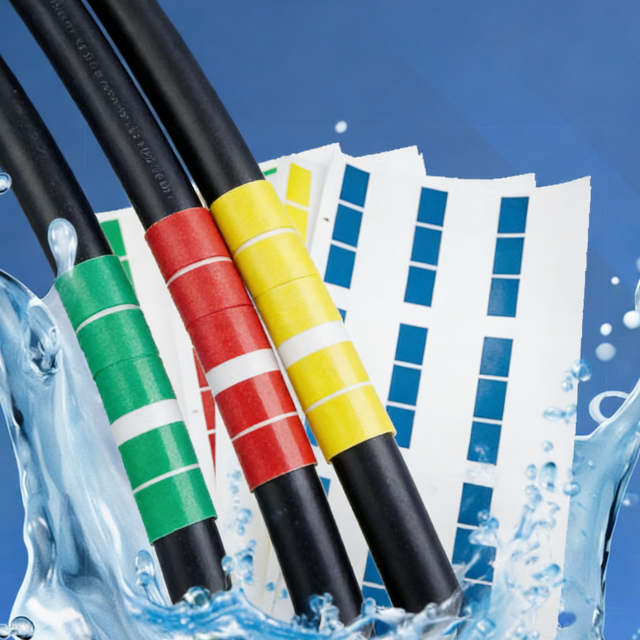
Self-laminating wraps feature a white printable area and a clear tail that wraps around the wire to protect the printed text. Flag labels pinch together around the wire to create a flat, readable surface that sticks out from the cable. A versatile Label Printer handles all these media types by simply swapping the cartridge or adjusting the media guides, allowing you to tackle any identification task with a single tool.
How to Prevent Heat-Shrink Label Printing Problems
Print smudging or fading ruins identification efforts and causes audit failures. This risk occurs when the ribbon chemistry does not match the substrate. If you use a cheap wax ribbon on polyolefin tubing, the ink will wipe off with a simple thumb rub. Ensure exact matching of the ribbon type to the tubing material. Always use full resin ribbons for cross-linked polyolefin to guarantee a permanent, chemical-resistant bond.
Tubing damage during heat application compromises wire insulation and creates safety hazards. Excessive heat melts the printed legend, scorches the wire jacket, or splits the tubing. Establish strict guidelines for using high-quality heat guns with variable temperature controls. Keep the heat source moving constantly around the circumference of the wire. Maintain correct shrinking temperatures, typically between 90°C and 120°C, to prevent structural damage to the polyolefin.
Media jamming halts production immediately and frustrates operators. Jams happen when flattened tubing catches on internal guides, curls inside the mechanism, or sticks to the printhead. Perform regular printhead cleaning using approved isopropyl alcohol swabs to remove adhesive residue and polyolefin dust. Ensure the tension guides are properly calibrated for the specific thickness of the flattened tubing you are running. Never pull the tubing forcefully through the machine while the printhead is locked down.
Unreadable text post-shrink defeats the entire purpose of labeling. Characters compress and become illegible blobs when the tube recovers to its final diameter, especially with 3:1 ratio tubing. Utilize software features that pre-calculate shrinkage and stretch the text horizontally before printing. Alternatively, manually select bold, sans-serif fonts at a higher point size and add extra character spacing to compensate for the physical reduction during the heating process.
Conclusion
Selecting suitable printing hardware is easier when manufacturers work with a supplier that understands the relationship between media materials, ribbon chemistry, printer performance, and automated identification workflows. Established in 2008, GAOFE specializes in the research, development, and manufacturing of specialty labeling solutions and industrial identification systems, including industrial printers, automated labeling equipment, durable labels, printing consumables, and traceability software.
The right hardware choice is dictated entirely by your print volume, location, and specific environmental durability requirements. You must align the hardware form factor with your daily workflow to achieve reliable wire identification. Handheld units provide necessary mobility for field repairs, while desktop units deliver the speed and bulk capacity required for manufacturing.
Audit your most common wire gauges to determine the exact flattened tubing widths you require for your projects.
Identify your primary working environment to decide between a battery-powered handheld or an AC-powered desktop unit.
Verify any required industry certifications, such as UL or MIL-SPEC, for your specific application before purchasing media.
Test a sample of the printed tubing with your standard heat gun to confirm text legibility post-shrinkage.
FAQ
Q: Can I use a direct thermal printer for heat-shrink tubing?
A: No. Direct thermal printers use heat to darken the label material. If you print on direct thermal heat-shrink tubing, applying a heat gun to shrink the tube will turn the entire surface black, destroying the text.
Q: What is the difference between flattened width and recovered diameter?
A: Flattened width measures the tubing when pressed flat, which dictates if it fits in the printer. Recovered diameter is the final internal size of the tubing after you apply heat to shrink it around the wire.
Q: Why does the ink smear on my heat-shrink labels?
A: Ink smearing usually occurs because you are using a wax ribbon instead of a resin ribbon. Cross-linked polyolefin tubing requires a full resin thermal transfer ribbon to create a permanent, smudge-proof bond.
Q: How do I choose between a 2:1 and 3:1 shrink ratio?
A: Use a 2:1 ratio for standard wires where the tubing easily slips over the end. Use a 3:1 ratio when the tubing must pass over large, pre-installed connectors but still shrink tightly around a much smaller wire jacket.
Q: Can portable label makers print on bulk rolls of tubing?
A: Generally, no. Most portable handheld units require proprietary drop-in cartridges. To use bulk continuous rolls of heat-shrink tubing, you typically need a desktop or industrial thermal transfer machine.
Q: What temperature should I use to shrink printed tubing?
A: Most standard polyolefin heat-shrink tubing requires a temperature between 90°C and 120°C. Keep the heat gun moving constantly to avoid scorching the printed text or melting the underlying wire insulation.


